Introduction
Setting up a new Dell monitor for your Dell desktop can greatly enhance your computing experience. Whether you are upgrading your setup for work, gaming, or daily use, connecting these devices correctly is crucial for smooth operation. This step-by-step guide will help even the least tech-savvy individuals successfully connect their devices with ease.

Unboxing and Checking Your Equipment
Before diving into the setup process, it’s important to start with unboxing and inspection. Carefully open the packaging of both your Dell monitor and desktop, taking out all the components. Check to ensure you have the following items:
- Dell monitor
- Monitor stand or arm
- Power cable for the monitor
- Video cables (HDMI, DisplayPort, or VGA)
- Dell desktop unit
- Power cable for the desktop
- User manuals
Having these items organized and ready will make the connection process smoother. Verify every component to avoid any last-minute hassle.
Identifying the Ports on Your Dell Monitor and Desktop
To successfully connect your Dell monitor to your Dell desktop, you need to identify the ports available on both devices. Typically, Dell monitors and desktops come with a variety of ports, including HDMI, DisplayPort, and VGA.
On the Monitor:
- HDMI: Used for high-definition audio and video
- DisplayPort: Provides a high bandwidth connection for video
- VGA: An older port for standard-definition video
On the Desktop:
- HDMI: Common and likely to find at least one HDMI port
- DisplayPort: Standard on modern desktops
- VGA: Less common but still available on older models
Accurately identifying these ports beforehand will help you decide on the best connection method.
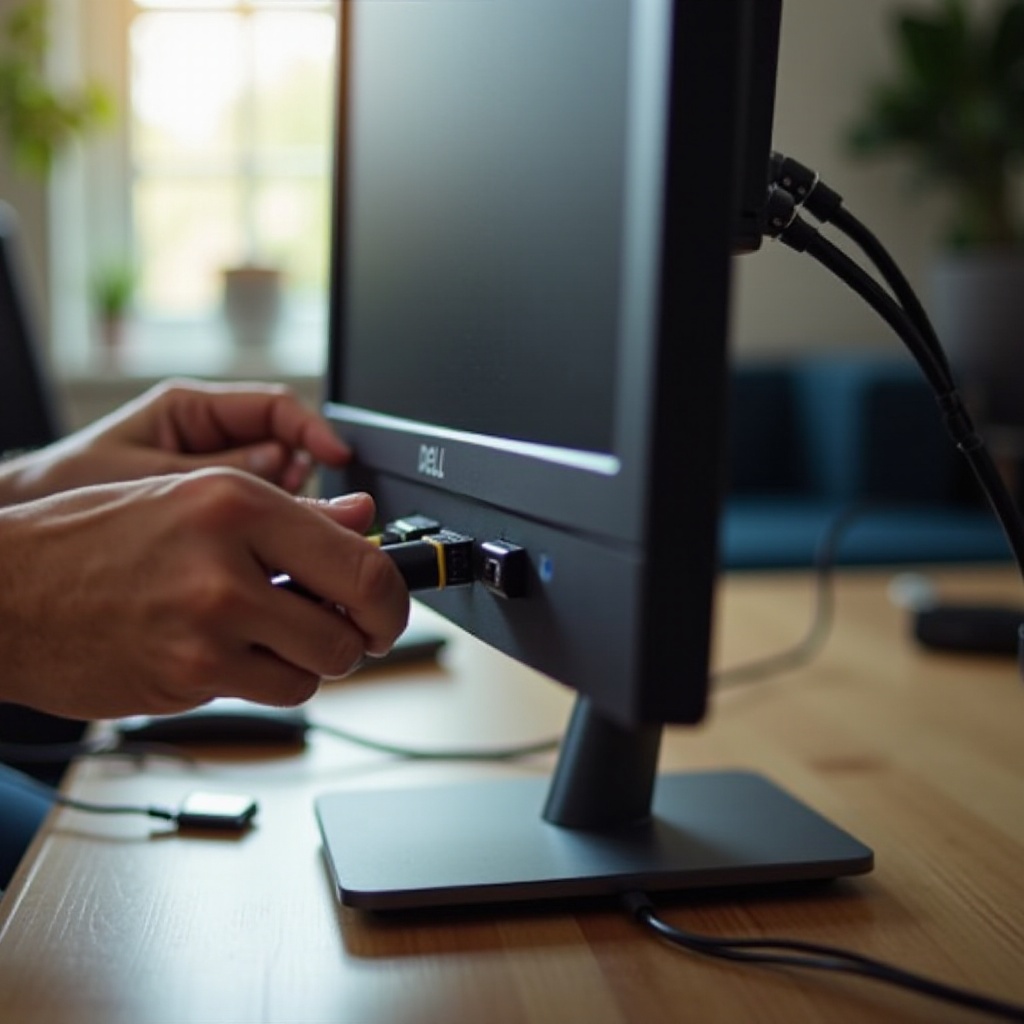
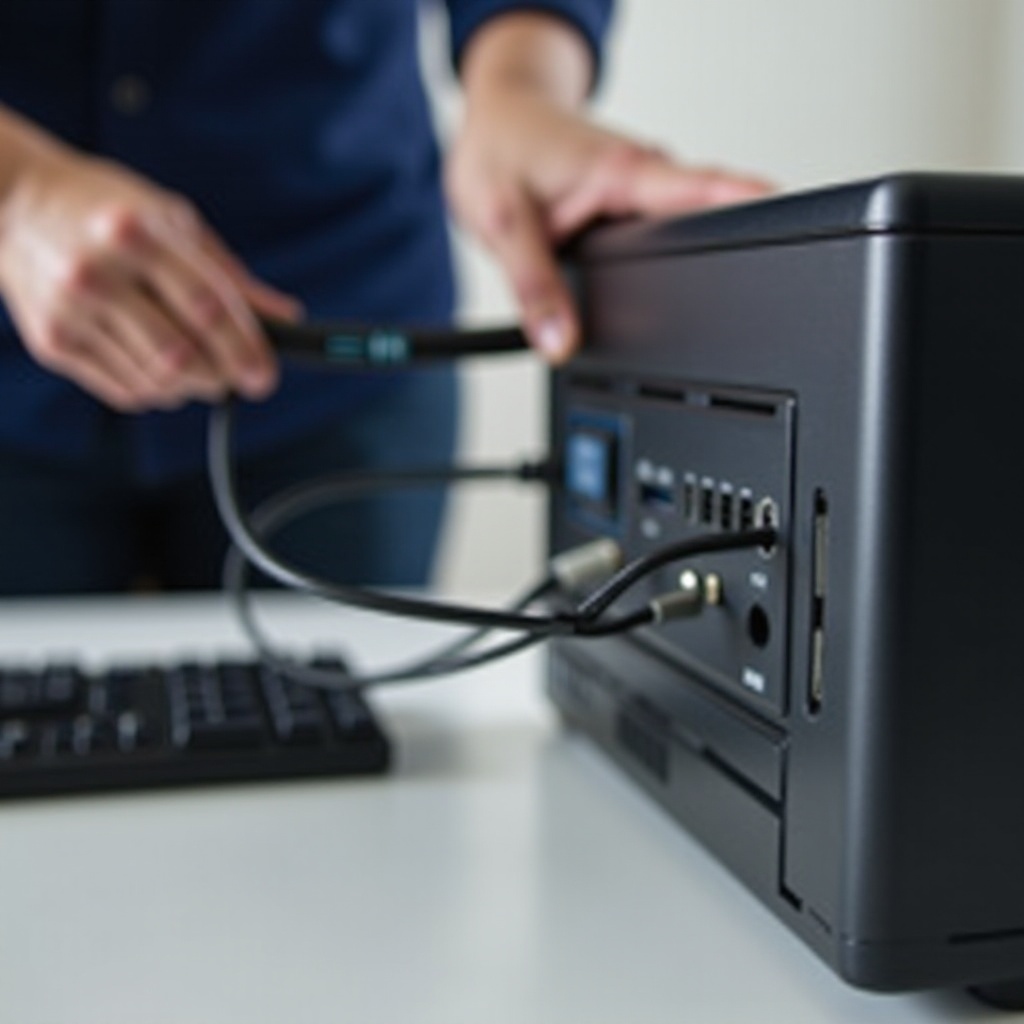
Connecting the Monitor to the Desktop
With the ports identified, it’s time to connect the monitor to the desktop. Depending on which cables you have, you can choose from the following methods:
Connecting via HDMI
- Locate the HDMI port on both the desktop and the monitor.
- Plug one end of the HDMI cable into the HDMI port on the desktop.
- Connect the other end of the HDMI cable to the HDMI port on the monitor.
- Ensure both ends are firmly seated to avoid connection issues.
Connecting via DisplayPort
- Identify the DisplayPort on both devices.
- Insert one end of the DisplayPort cable into the desktop’s DisplayPort.
- Connect the other end to the DisplayPort on the monitor.
- Secure the connections by making sure the cable clicks into place.
Connecting via VGA
- Locate the VGA port on both the monitor and the desktop.
- Connect one end of the VGA cable to the desktop’s VGA port.
- Attach the other end to the monitor’s VGA port.
- Tighten the screws on the VGA connectors to ensure they are secure.
After connecting via one of these methods, you’re ready to power on the devices and proceed with the initial setup.
Powering On and Initial Setup
With the monitor and desktop connected, the next step is to power them on and continue with the initial setup:
- Plug the power cables into both the monitor and the desktop.
- Connect the power cables to an electrical outlet.
- Press the power button on the desktop first.
- Turn on the monitor using its power button, generally located on the bottom or the side.
At this point, the monitor should display the desktop screen. If it doesn’t, check your connections and make sure the monitor is set to the correct input source.
Adjusting Display Settings in Windows
To make the most of your new monitor, you might need to adjust the display settings in Windows:
- Right-click on the desktop and select ‘Display settings’.
- In the ‘Display’ menu, you can adjust several parameters:
- Resolution: Ensure it matches the monitor’s recommended resolution.
- Orientation: Set this based on personal preference (landscape, portrait).
- Multiple displays: If you have more than one monitor, configure the layout.
Save the settings and confirm that the display looks good and functions properly.
Troubleshooting Common Issues
If you encounter problems during the process, here are some common issues and their solutions:
- Monitor not displaying: Recheck the cable connections and make sure the monitor is on the correct input source.
- Fuzzy image quality: Adjust the screen resolution in the display settings to match the monitor’s native resolution.
- No sound (HDMI): Enable the audio output through the monitor in the sound settings.
Taking these steps can resolve most basic connectivity problems.
Conclusion
Connecting a Dell monitor to a Dell desktop is a straightforward process when you follow the correct steps. Make sure that the connections are secure, the monitor is properly powered, and your system settings are configured correctly. By adhering to this guide, you should have a functional and optimized display setup without any hassle.
Frequently Asked Questions
What should I do if my Dell monitor is not detected?
Ensure all cables are securely connected and the correct input source is selected. Check for updates to the display driver.
How can I improve the image quality on my Dell monitor?
Align the resolution settings in Windows with the monitor’s optimal resolution. Adjust the monitor’s color settings as needed.
Can I connect multiple Dell monitors to my Dell desktop?
Yes, you can connect multiple monitors using available ports. Depending on your desktop’s hardware, you may need additional configuration in the display settings.